# Cloud Connector Settings
#### (BETA Version)
###
Overview
####
Introduction
Welcome to the Macula Cloud connector beta program! We are excited to introduce a new feature for a secure and simple way to share your server connection with the remote Macula Monitor or Macula Console.
Cloud connector is a service that allows you to connect to remote Macula without configuring port forwarding on either side. The cloud service is available for Macula Console and Macula Monitor applications that connect to Macula servers. Other applications are not supported at this point.
{% hint style="danger" %}
PLEASE, CONSIDER THAT YOU ARE USING BETA VERSION OF THIS FEATURE. WE CAN'T GUARANTEE IT'S STABILITY. ALTHOUGH WE ARE HAPPY TO RECEIVE YOUR FEEDBACK THROUGH OUR SUPPORT ENGINEERS, SOME ISSUES MAY BE RESOLVED ONLY WITH THE NEXT RELEASES.
{% endhint %}
This service is available thanks to the rendezvous server provided by the cloud server. The cloud server helps you to establish a connection to remote Macula servers behind NAT without opening/forwarding ports on the router(s). The traffic exchange then goes directly between the VMS client and the VMS server and does not go through the cloud connector server.
**Use case example**: Macula is part of a complex and secure network, and it is too complicated or even impossible to permanently open certain ports on the router and the firewall. Cloud connector uses random ports to establish the connection utilizing UPnP technology.
Configuration steps:
* Register your Macula in the cloud
* Add server connection on the remote client (Macula Monitor or Macula Console)
* Unregister the server when you no longer wish to access it remotely
### Installation and Setup
#### Pre-requisites
Before you begin, ensure your system meets the following requirements:
* **VMS software**: Preinstalled Macula Professional 1.28, or Macula Enterprise 1.30
* **Operating System**: Windows 10 or later.
* **Hardware**: A modern CPU, 8GB of RAM, and sufficient storage space.
* **Network**: A stable internet connection is needed.
#### Server registration
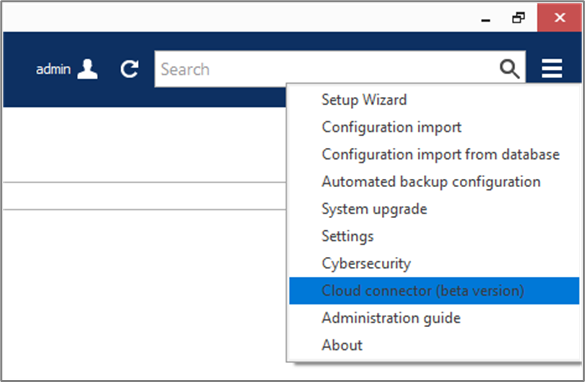
After installing or upgrading the software version, open Macula Console and then open the *Cloud connector* dialog box from the main application menu (top right corner button).
In the Local server tab:
1. Click the Register server button\

2. Choose authentication mode (Google account/Microsoft account/Apple ID)\*\

3. Sign in using the chosen method\

4. Wait until Macula Console registers your server in the cloud\
\*Your account data will not be stored on the cloud servers. The selected sign-in method will only be used to verify your identity and to group servers under the same account.
5. Select your authentication provider and switch to your browser.\

6. Select your user and continue with the registration. If the registration is successful, you will see a confirmation message in the browser. Return to the Macula Console to finish the registration.\

7. It is worth saving the Client token for later. You can reuse it to connect any Macula Monitor to the Macula via a cloud connector.\

8. You have two additional tabs with connection options and status. In the connection tab, you can switch how the server uses ports. By default, software will attempt to pierce the tunnel. If the connection is unsuccessful, you can switch to uPnP, which may solve the situation.\
\

#### Connect with the Macula Console to the Remote Server
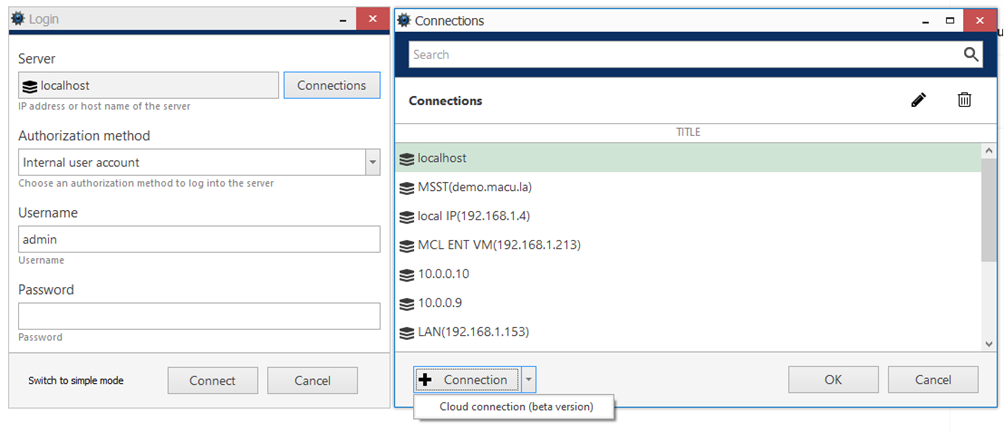
When you start Macula Console, switch to the advanced mode using the button in the bottom left corner before logging in. Then, click the *Connections* button next to the server name to open the connection list. Here, you can pre-configure server connections (address+name) for both usual and cloud servers.
To add a new cloud server connection, click the down arrow next to the *+ Connection* button and choose *Cloud connection*.
Paste the token from the cloud registration inside the *Add cloud server - token* pop-up window.
After the connection is established, log in to the remote server using the remote server user for the user name and password.
That's it. You are connected to the remote server via Macula Console.
{% hint style="danger" %}
Through the cloud, you can connect only to the Macula Enterprise or Macula Professional server, **direct connections to the Recording and Mirroring servers are not possible**. To redirect traffic from the recording servers through the Macula Enterprise server, mark the *Allow Gateway mode* checkbox under the *Configure cloud connection* button.
{% endhint %}